Introduction
There is a noticeable difference between wearing a shirt and wearing one well.
A perfectly ironed shirt communicates attention to detail. It makes formalwear look sharper, casual outfits feel more refined, and instantly improves overall presentation.
Yet surprisingly, many people still struggle with one simple question: how to iron a shirt properly without leaving wrinkles behind.
The good news is that ironing a shirt is not complicated.
Once you understand the correct order and a few professional techniques, achieving a clean, crisp finish becomes much easier.
Here is everything you need to know.
Why Proper Shirt Ironing Matters
Ironing is more than simply removing wrinkles.
A properly pressed shirt improves fabric appearance, extends garment life, and helps maintain a polished look.
Well-ironed clothing offers several benefits:
- Creates a cleaner professional appearance
- Prevents deep wrinkle formation over time
- Helps preserve fabric structure
- Improves confidence during formal occasions
- Makes clothing look newer and more expensive
In many ways, ironing is one of the easiest style upgrades available.
What You Need Before You Start
Before learning how to iron a shirt, prepare the right tools.
You will need:
- A quality steam iron
- Clean ironing board
- Distilled water for steam function
- Spray bottle for stubborn wrinkles
- Clean cotton shirt or dress shirt
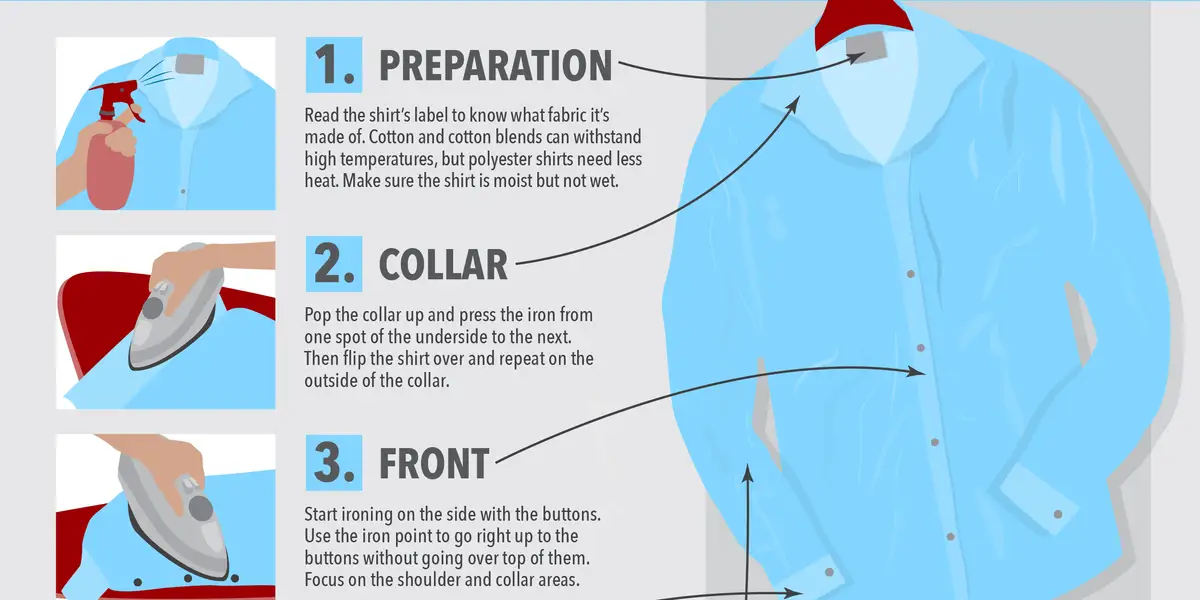
Always check the clothing label first.
Different fabrics require different heat settings.
Step 1: Set the Correct Temperature
Different materials react differently to heat.
As a general rule:
Low heat
- Polyester
- Synthetic fabrics
Medium heat
- Wool blends
- Rayon
High heat
- Cotton
- Linen
Starting too hot can permanently damage fabric.
When unsure, begin with lower heat.
Step 2: Iron the Collar First
Professional tailors always begin with the collar.
Lay the collar flat and iron from the outer edges toward the center.
Then flip the collar and repeat.
This prevents uneven pressing.
Since collars are highly visible, this step matters more than people realize.
Step 3: Move to the Shirt Cuffs
Unbutton the cuffs completely.
Lay them flat against the ironing board.
Iron both sides carefully while smoothing fabric with your hand.
Pay attention to edges.
Wrinkled cuffs immediately make a shirt look unfinished.
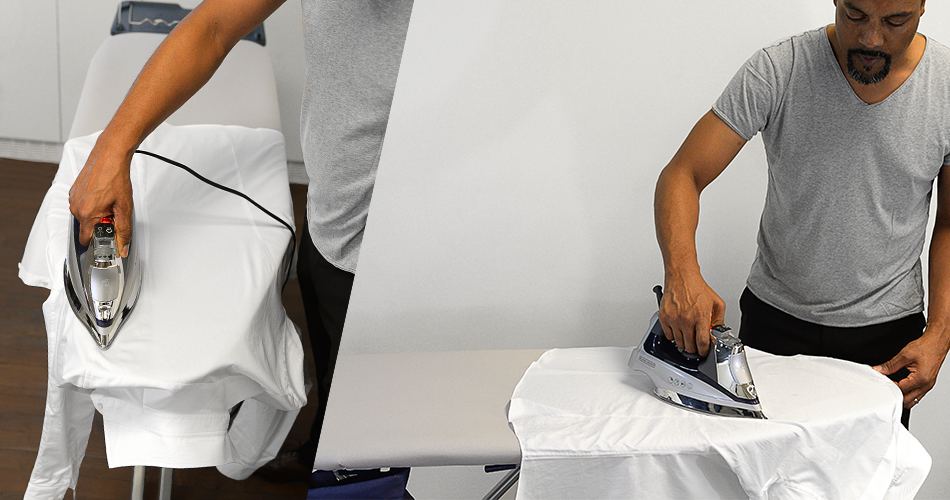
Step 4: Iron the Sleeves Carefully
Sleeves often create the most frustration.
Lay one sleeve flat along the board.
Smooth out wrinkles before applying heat.
Iron from shoulder area toward the cuff slowly.
Repeat on the other sleeve.
For dress shirts, avoid pressing overly sharp creases unless that style is intentional.
A natural smooth finish often looks better.
Step 5: Press the Shoulder Area
The shoulder section requires patience.
Place the curved shoulder area around the narrow end of the ironing board.
Press carefully while rotating fabric gradually.
This area shapes the overall appearance of the shirt.
Taking extra time here improves the final result significantly.
Step 6: Iron the Front Panels
Now move to the front of the shirt.
Work one side at a time.
Pay close attention near buttons.
Avoid placing the iron directly over buttons.
Instead, carefully work around them.
Move slowly and keep fabric flat.
This prevents new wrinkles from forming while ironing.
Step 7: Finish With the Back Section
The back panel is usually the largest area.
Spread it smoothly across the ironing board.
Start near the top and gradually work downward.
Use long, controlled strokes.
Steam helps remove deeper wrinkles quickly.
Once finished, the shirt should feel evenly pressed from top to bottom.
Common Mistakes People Make

Learning how to iron a shirt becomes much easier when avoiding simple mistakes.
Using Too Much Heat
High temperatures can scorch delicate fabric.
Leaving the Shirt Too Dry
Slight moisture helps remove wrinkles faster.
Ironing Dirty Fabric
Heat can permanently lock stains into clothing.
Rushing Through Sleeves
Sleeves often reveal poor ironing technique immediately.
Small mistakes affect overall appearance more than most people realize.
Professional Tips for Better Results
Simple habits can dramatically improve results.
Try these techniques.
Use steam whenever possible
Steam loosens fabric fibers more effectively.
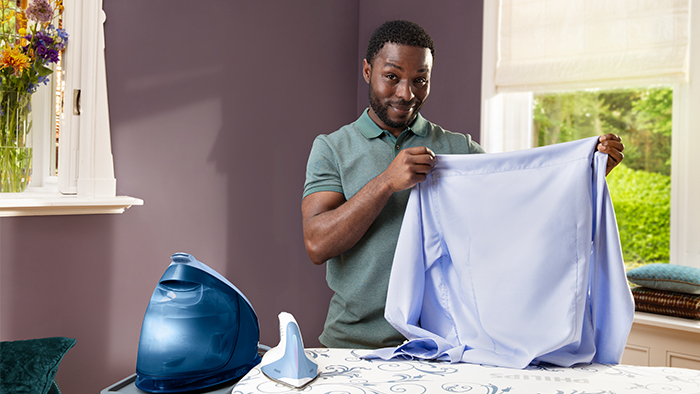
Hang immediately after ironing
Leaving a shirt folded can create new wrinkles.
Iron slightly damp fabric
This creates smoother results.
Clean your iron regularly
Residue on the iron plate can transfer to clothing.
Professionals rely on these small habits consistently.
How to Keep Shirts Wrinkle-Free Longer
Ironing is only half the process.
Storage matters too.
To keep shirts looking crisp:
- Use quality hangers
- Avoid overcrowding closet space
- Button the top button when hanging
- Let shirts cool completely before wearing
- Store dress shirts vertically
These habits help preserve the pressed look much longer.
Frequently Asked Questions
How often should you iron a dress shirt?
A dress shirt should generally be ironed after every wash if you want a crisp, wrinkle-free appearance. Shirts worn for business meetings, formal events, or professional settings typically look best when freshly pressed.
Is it better to iron a shirt when it is slightly damp?
Yes. Slightly damp fabric is usually easier to iron because moisture helps relax the fibers. This allows wrinkles to smooth out faster and often produces a cleaner finish than ironing completely dry fabric.
Can steam remove wrinkles without direct ironing?
Steam can remove light wrinkles from many fabrics, especially cotton blends and dress shirts. However, for a sharp, professional finish, direct ironing typically provides better results than steaming alone.
What is the easiest way to prevent shirts from wrinkling after ironing?
The best way is to hang the shirt immediately after ironing, allow it to cool completely, and store it on a quality hanger with enough space around it. Proper storage helps maintain a freshly pressed appearance for longer.
Can ironing damage a shirt?
Yes. Excessive heat, leaving the iron in one spot too long, or using the wrong temperature setting can damage fabric fibers, create shine marks, or even scorch the material. Always follow the garment care label instructions before ironing.
Final Thoughts
Knowing how to iron a shirt is one of those overlooked skills that quietly improves everyday presentation.
It takes only a few extra minutes, yet the difference is immediately visible.
A well-pressed shirt looks cleaner, sharper, and more intentional.
Whether preparing for work, an event, or simply maintaining a polished appearance, mastering proper ironing is a surprisingly valuable life skill.
Sometimes elegance comes down to small details.
And a perfectly ironed shirt is one detail people notice more than you think.
